
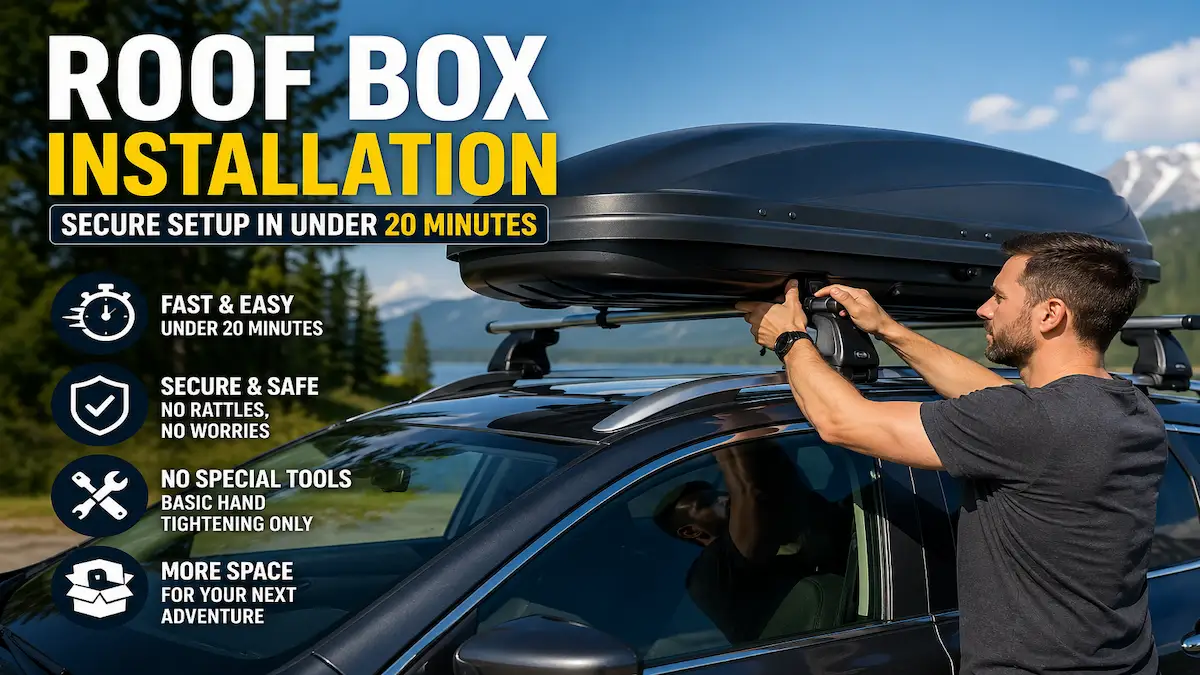
TL;DR: How to Install a Roof Box on a Car
Roof box installation involves securely mounting a roof box to compatible roof rack crossbars, positioning it correctly for balanced weight distribution, respecting roof load limits, tightening mounting hardware properly, and performing safety checks before driving. A correctly installed roof box increases storage capacity without compromising vehicle safety, handling, or reliability.
As an automotive technician, I’ve inspected countless vehicles fitted with roof boxes for holidays, camping trips, and long-distance travel. I’ve seen installations that performed flawlessly for years and others that created problems before the vehicle even left the driveway.
Many roof box installation guides focus only on attaching the box to the roof rack. What they often miss are the practical issues that appear later, such as excessive wind noise, poor weight distribution, tailgate clearance problems, and mounting hardware that loosens after a few hundred kilometres. This guide combines manufacturer recommendations with real-world experience to help you avoid those mistakes from the beginning.
What’s Inside? (Quick Glance)
Why Proper Roof Box Installation Matters
A roof box is one of the most practical upgrades for drivers who regularly travel with extra luggage. Whether you’re carrying camping equipment, sports gear, holiday bags, or bulky items that won’t comfortably fit inside the vehicle, a roof box can significantly increase storage capacity without the need for a trailer.
However, unlike cargo stored in the boot, a roof box sits at the highest point of the vehicle. This means its installation directly affects aerodynamics, handling, braking performance, and fuel economy. Even a small installation mistake can become noticeable during motorway driving or emergency manoeuvres.
I once inspected an SUV before a family road trip where the roof box appeared perfectly installed at first glance. The mounting system was secure, the cargo was packed neatly, and the owners were ready to leave. The problem became obvious when they opened the tailgate. It struck the rear edge of the roof box every time. The fix took less than five minutes, but discovering the issue on departure day caused unnecessary stress that could have been avoided with a simple clearance check.
Taking the time to install a roof box correctly improves safety, protects your vehicle, and makes long journeys far more enjoyable.
Verify Compatibility Before You Start
Before lifting a roof box onto the vehicle, compatibility should always be your first consideration. One mistake I frequently see is drivers assuming that any roof box will fit any roof rack. Unfortunately, that’s not always the case.
Most modern roof boxes are designed to work with a range of roof rack systems, but there are still important differences between square bars, aero bars and factory-fitted crossbars. The mounting hardware supplied with the roof box must be capable of securing properly around the specific crossbars fitted to the vehicle.
Vehicle roof load ratings are another area that is often misunderstood. The maximum roof load listed by the manufacturer includes the weight of the roof rack, the roof box and the cargo being carried. For example, if a vehicle has a maximum roof load rating of 75 kilograms and the roof rack and roof box together weigh 25 kilograms, only 50 kilograms of cargo capacity remains available.
I’ve spoken to owners who believed the roof box rating alone determined how much they could carry. In reality, the vehicle’s roof load limit is equally important and should never be exceeded.
Another factor worth checking is rear hatch clearance. Many SUVs and hatchbacks have large tailgates that extend high when opened. If the roof box is positioned too far rearward, the tailgate can strike the box every time it opens. I’ve seen this happen more than once, and in some cases it resulted in damaged paintwork and cracked plastic trim.
Spending five minutes checking compatibility before installation can prevent hours of frustration later.
Roof Box Installation Accessories
Before starting your roof box installation, get these ready:
- Roof box with mounting hardware
- Installed roof rack crossbars
- Step stool or ladder
- Measuring tape
- A helper (trust me, it helps)
Preparing for Roof Box Installation
Successful installation starts long before the roof box touches the vehicle. I always recommend placing the box on a clean surface and inspecting all mounting components first. This includes the clamps, bolts, brackets, hinges and locking mechanisms.
Even brand-new products should be inspected carefully. Missing hardware, manufacturing defects or transport damage occasionally occur, and it’s much easier to identify those issues before the box is mounted on the roof.
The vehicle should also be parked on level ground. Installing a roof box on a steep driveway or uneven surface makes alignment more difficult and increases the chance of accidental damage. Cleaning the roof rack crossbars beforehand is another small step that often gets overlooked. Dirt trapped between mounting surfaces can affect how securely the clamps seat against the crossbars and may even contribute to scratches over time.
Step-by-Step Roof Box Installation
Once you’ve confirmed compatibility, checked your roof load limits, and gathered the necessary equipment, it’s time to install the roof box. While different manufacturers use slightly different mounting systems, the overall installation process is largely the same.
Step 1: Position the Roof Box on the Roof Rack
The first stage involves lifting the roof box onto the roof rack crossbars and placing it in a rough installation position.
If possible, ask another person to assist with this step. Although many roof boxes are relatively lightweight, their size makes them awkward to handle. Trying to lift a large roof box alone increases the risk of damaging the vehicle, dropping the roof box, or straining your back.
Carefully place the roof box onto the crossbars without dragging it across painted surfaces. Even small amounts of trapped dirt can leave visible scratches.
At this stage, the roof box does not need to be perfectly aligned. The goal is simply to position it safely on the roof rack so adjustments can be made before securing the mounting hardware.
Take a moment to confirm that the roof box sits evenly across both crossbars and that all mounting points will be accessible during installation.
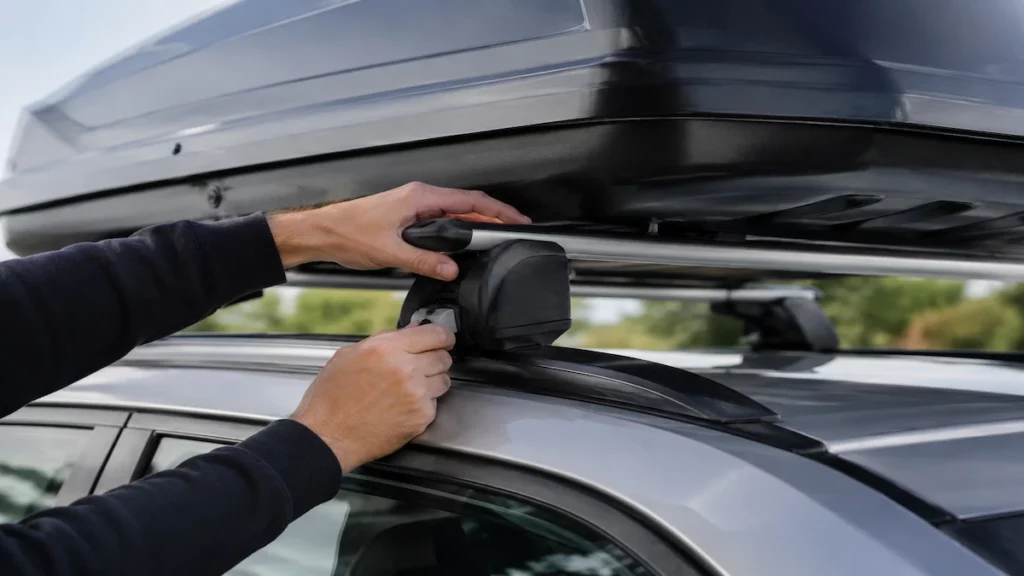
Step 2: Align the Mounting Points with the Crossbars
With the roof box resting securely on the roof rack, the next task is aligning the mounting system with the crossbars.
Most modern roof boxes use quick-mount clamps, U-bolts, or integrated mounting systems. Regardless of the design, every mounting point should sit squarely on the crossbars and engage properly before tightening begins.
Start by centring the roof box from left to right. An off-centre roof box not only looks unbalanced but can also affect weight distribution and aerodynamics.
Next, adjust the roof box forwards or backwards until the mounting points align correctly with the crossbars. This is also the ideal time to consider tailgate clearance. Vehicles with large rear hatches often require the roof box to be positioned slightly forward.
During one workshop inspection, a customer complained about excessive wind noise at motorway speeds. The roof box was securely attached, but it had been installed slightly off-centre. Correcting the alignment reduced turbulence and noticeably improved driving comfort.
Before moving on, step back and inspect the roof box from multiple angles to ensure it appears centred and evenly positioned.
Step 3: Secure the Mounting Hardware
Once the roof box has been aligned correctly, you can begin securing the mounting hardware.
A common mistake is fully tightening one clamp before securing the others. This can create uneven pressure and cause the roof box to shift slightly out of alignment.
Instead, attach all mounting points loosely first. Once every clamp or bracket is engaged, gradually tighten them in stages.
I generally recommend alternating between opposite corners during tightening. For example, tighten the front-left mounting point slightly, then move to the rear-right, followed by the front-right and rear-left. This approach distributes pressure evenly across the roof box.
If the manufacturer provides torque specifications, use a torque wrench to achieve the recommended setting. Overtightening is surprisingly common and can damage mounting brackets, distort plastic mounting points, or place unnecessary stress on the roof rack system.
Once tightening is complete, inspect every mounting point individually and verify that all hardware is fully engaged.
Step 4: Check Tailgate Clearance
Before finalising the installation, perform a complete clearance check.
Slowly open the rear hatch or tailgate and observe the gap between the roof box and the vehicle. Ideally, there should be enough space to allow the tailgate to open fully without contacting the roof box.
This simple step is frequently overlooked. In fact, tailgate interference is one of the most common roof box installation issues I encounter during vehicle inspections.
If the tailgate makes contact with the roof box, loosen the mounting hardware and reposition the roof box slightly forward. Repeat the clearance test until adequate space is achieved.
While performing this inspection, also confirm that all doors open normally and that any sunroof fitted to the vehicle can still operate correctly.
Spending a few extra minutes checking clearances now can prevent expensive paint damage and unnecessary frustration later.
Step 5: Perform a Stability Inspection
Once the roof box is securely mounted and correctly positioned, it’s time to verify stability.
Grip the roof box firmly and apply moderate pressure from different directions. Push side to side, front to back, and gently upwards.
A properly installed roof box should feel solid and move together with the roof rack system. There should be no rattling, excessive movement, or signs that the mounting hardware is loose.
This inspection helps identify issues before the vehicle leaves the driveway. If anything feels unstable, stop and investigate immediately rather than assuming the problem will resolve itself during driving.
In workshop environments, we always perform this test before loading cargo because it’s one of the easiest ways to catch installation errors early.
Step 6: Conduct a Short Test Drive
The final installation step is a short road test. Drive the vehicle for approximately 10 to 15 minutes at a variety of speeds. Start on lower-speed suburban roads before progressing to higher-speed roads where safe and legal.
During the drive, pay attention to unusual wind noise, rattling sounds, vibrations, or any unexpected changes in vehicle handling.
After returning, inspect the mounting hardware again. Many manufacturers recommend rechecking the roof box after the first 50 kilometres because components can settle slightly once exposed to real-world driving conditions.
This final inspection provides confidence that the roof box is ready for travel and helps ensure long-term reliability.
Position and Load the Roof Box for Stability
Correct installation is only part of the equation. The way the roof box is positioned and loaded has a major influence on handling, wind noise, and overall driving comfort.
The ideal roof box position is usually slightly forward of the centre of the roof rack system while still maintaining adequate tailgate clearance. This helps distribute weight evenly across the crossbars and improves aerodynamic efficiency.
When loading cargo, place heavier items near the centre of the roof box and distribute weight evenly from front to rear. This reduces stress on mounting points and helps maintain vehicle stability during braking and cornering.
Many drivers are tempted to use every available centimetre of storage space, but weight limits remain more important than volume. A roof box can often reach its maximum safe load long before it is physically full.
For family holidays and road trips, I generally recommend storing lighter bulky items such as clothing, sleeping bags, and camping equipment in the roof box while keeping heavier items lower inside the vehicle whenever possible.
This approach improves stability, reduces strain on the roof rack system, and often results in a more comfortable driving experience.
Real Roof Box Installation Mistakes
Most roof box problems are not caused by defective products. They’re usually the result of small installation mistakes that seem insignificant at the time but become noticeable later.
One of the most common mistakes is skipping compatibility checks. Drivers often assume that any roof box will fit any roof rack system, only to discover mounting issues after beginning the installation. Verifying compatibility before purchasing or fitting the roof box saves time and frustration.
Another frequent mistake is exceeding roof load limits. Many people focus on the storage capacity of the roof box itself while forgetting that the vehicle’s roof load rating includes the roof rack, the roof box, and all luggage combined. Exceeding the manufacturer’s limit can negatively affect handling, braking performance, and overall stability.
Incorrect positioning is another issue I encounter regularly. A roof box mounted too far rearward may interfere with tailgate operation, while poor alignment can contribute to wind noise and aerodynamic inefficiency.
Rushing the installation process also creates unnecessary problems. Unevenly tightened mounting hardware, skipped inspections, and failure to perform a test drive are all common causes of avoidable issues.
Finally, many drivers simply forget to recheck mounting hardware after the first journey. Most manufacturers recommend inspecting the system after the initial 50 kilometres because components can settle slightly once exposed to real-world driving conditions.
Avoiding these common mistakes will help ensure a safer, quieter, and more reliable roof box ownership experience.
Roof Box Maintenance and Long-Term Care
A quality roof box can easily last many years when maintained properly.
Regular cleaning helps remove road grime, bird droppings and environmental contaminants that can gradually damage the finish. I recommend washing the box whenever the vehicle is washed during periods of regular use.
The mounting hardware should also be inspected periodically for signs of wear or corrosion. Locks and hinges benefit from occasional lubrication, particularly if the vehicle is frequently exposed to coastal environments or harsh weather conditions.
When the roof box is not required, storing it indoors can significantly extend its lifespan. Prolonged exposure to sunlight eventually affects even high-quality plastics, so protected storage is always beneficial.
For official load limits, check:
https://www.infrastructure.gov.au/vehicles
Check more DIY car care and maintenance tips here
Final Thoughts
A roof box is one of the most practical accessories you can add to a vehicle, but its benefits depend heavily on proper installation and maintenance. While fitting a roof box is not particularly difficult, the details surrounding compatibility, positioning, loading, and safety checks often determine whether the experience is positive or frustrating.
By following the seven roof box installation tips covered in this guide, you’ll dramatically reduce the risk of loose fittings, excessive wind noise, poor handling, tailgate clearance issues, and premature wear.
Throughout my years as an automotive technician, I’ve found that successful roof box ownership rarely comes down to the brand alone. It comes down to understanding the system, respecting weight limits, and taking the time to install everything correctly.
Whether you’re preparing for a family holiday, a camping trip, or a long-distance road adventure, proper roof box installation helps ensure safer, quieter, and more enjoyable travel.
Frequently Asked Questions
How long does roof box installation take?
Most roof box installations take between 20 and 45 minutes, depending on the mounting system and whether the roof rack is already fitted to the vehicle.
Can I install a roof box by myself?
Yes, but having a second person makes the process safer and significantly reduces the risk of scratching the vehicle or dropping the roof box during positioning.
How much weight can a roof box carry?
This depends on the roof box, roof rack, and vehicle. Always follow the lowest weight rating among the three components.
Do roof boxes affect fuel economy?
Yes. Because a roof box changes the vehicle’s aerodynamics, most drivers will notice some increase in fuel consumption, particularly at motorway speeds.
How often should I check the mounting hardware?
Inspect the mounting system after the first 50 kilometres of driving and before every major trip thereafter.
Can I leave a roof box on all year round?
You can, but removing it when not needed can improve fuel efficiency, reduce wind noise, and prolong the life of the roof box.
Why is my roof box making a rattling noise?
Rattling is usually caused by loose cargo, mounting hardware that needs tightening, or components inside the roof box shifting during travel.
What is the best position for a roof box?
In most cases, the roof box should be centred on the roof rack system and positioned far enough forward to allow full tailgate clearance.
Can a roof box damage my vehicle?
A properly installed roof box should not damage the vehicle. Problems typically occur when weight limits are exceeded, mounting systems are overtightened, or the box is incorrectly positioned.
Is a roof box worth buying?
For drivers who regularly travel with additional luggage or bulky equipment, a roof box is often one of the most practical accessories available. It increases storage capacity while keeping the cabin more comfortable for passengers.
Thank you for your useful information
Hi,
Thank you very much for your feedback.
This was really useful.
Roof boxes always seem simple until you’re standing there with bolts, clamps, and a ladder. Then it gets stressful fast.
Also the shake test makes alot of sense. Better to find the wobble in the driveway than on the highway.
Do you think most roof box problems happen from rushing the install?
Thank you very much for the valuable feedback. Absolutely. I think rushing is one of the biggest causes of roof box problems. Missing a clamp check or not tightening things evenly can easily lead to noise, wobbling, or even damage later on. Taking a few extra minutes during installation usually saves a lot of stress on the road.