
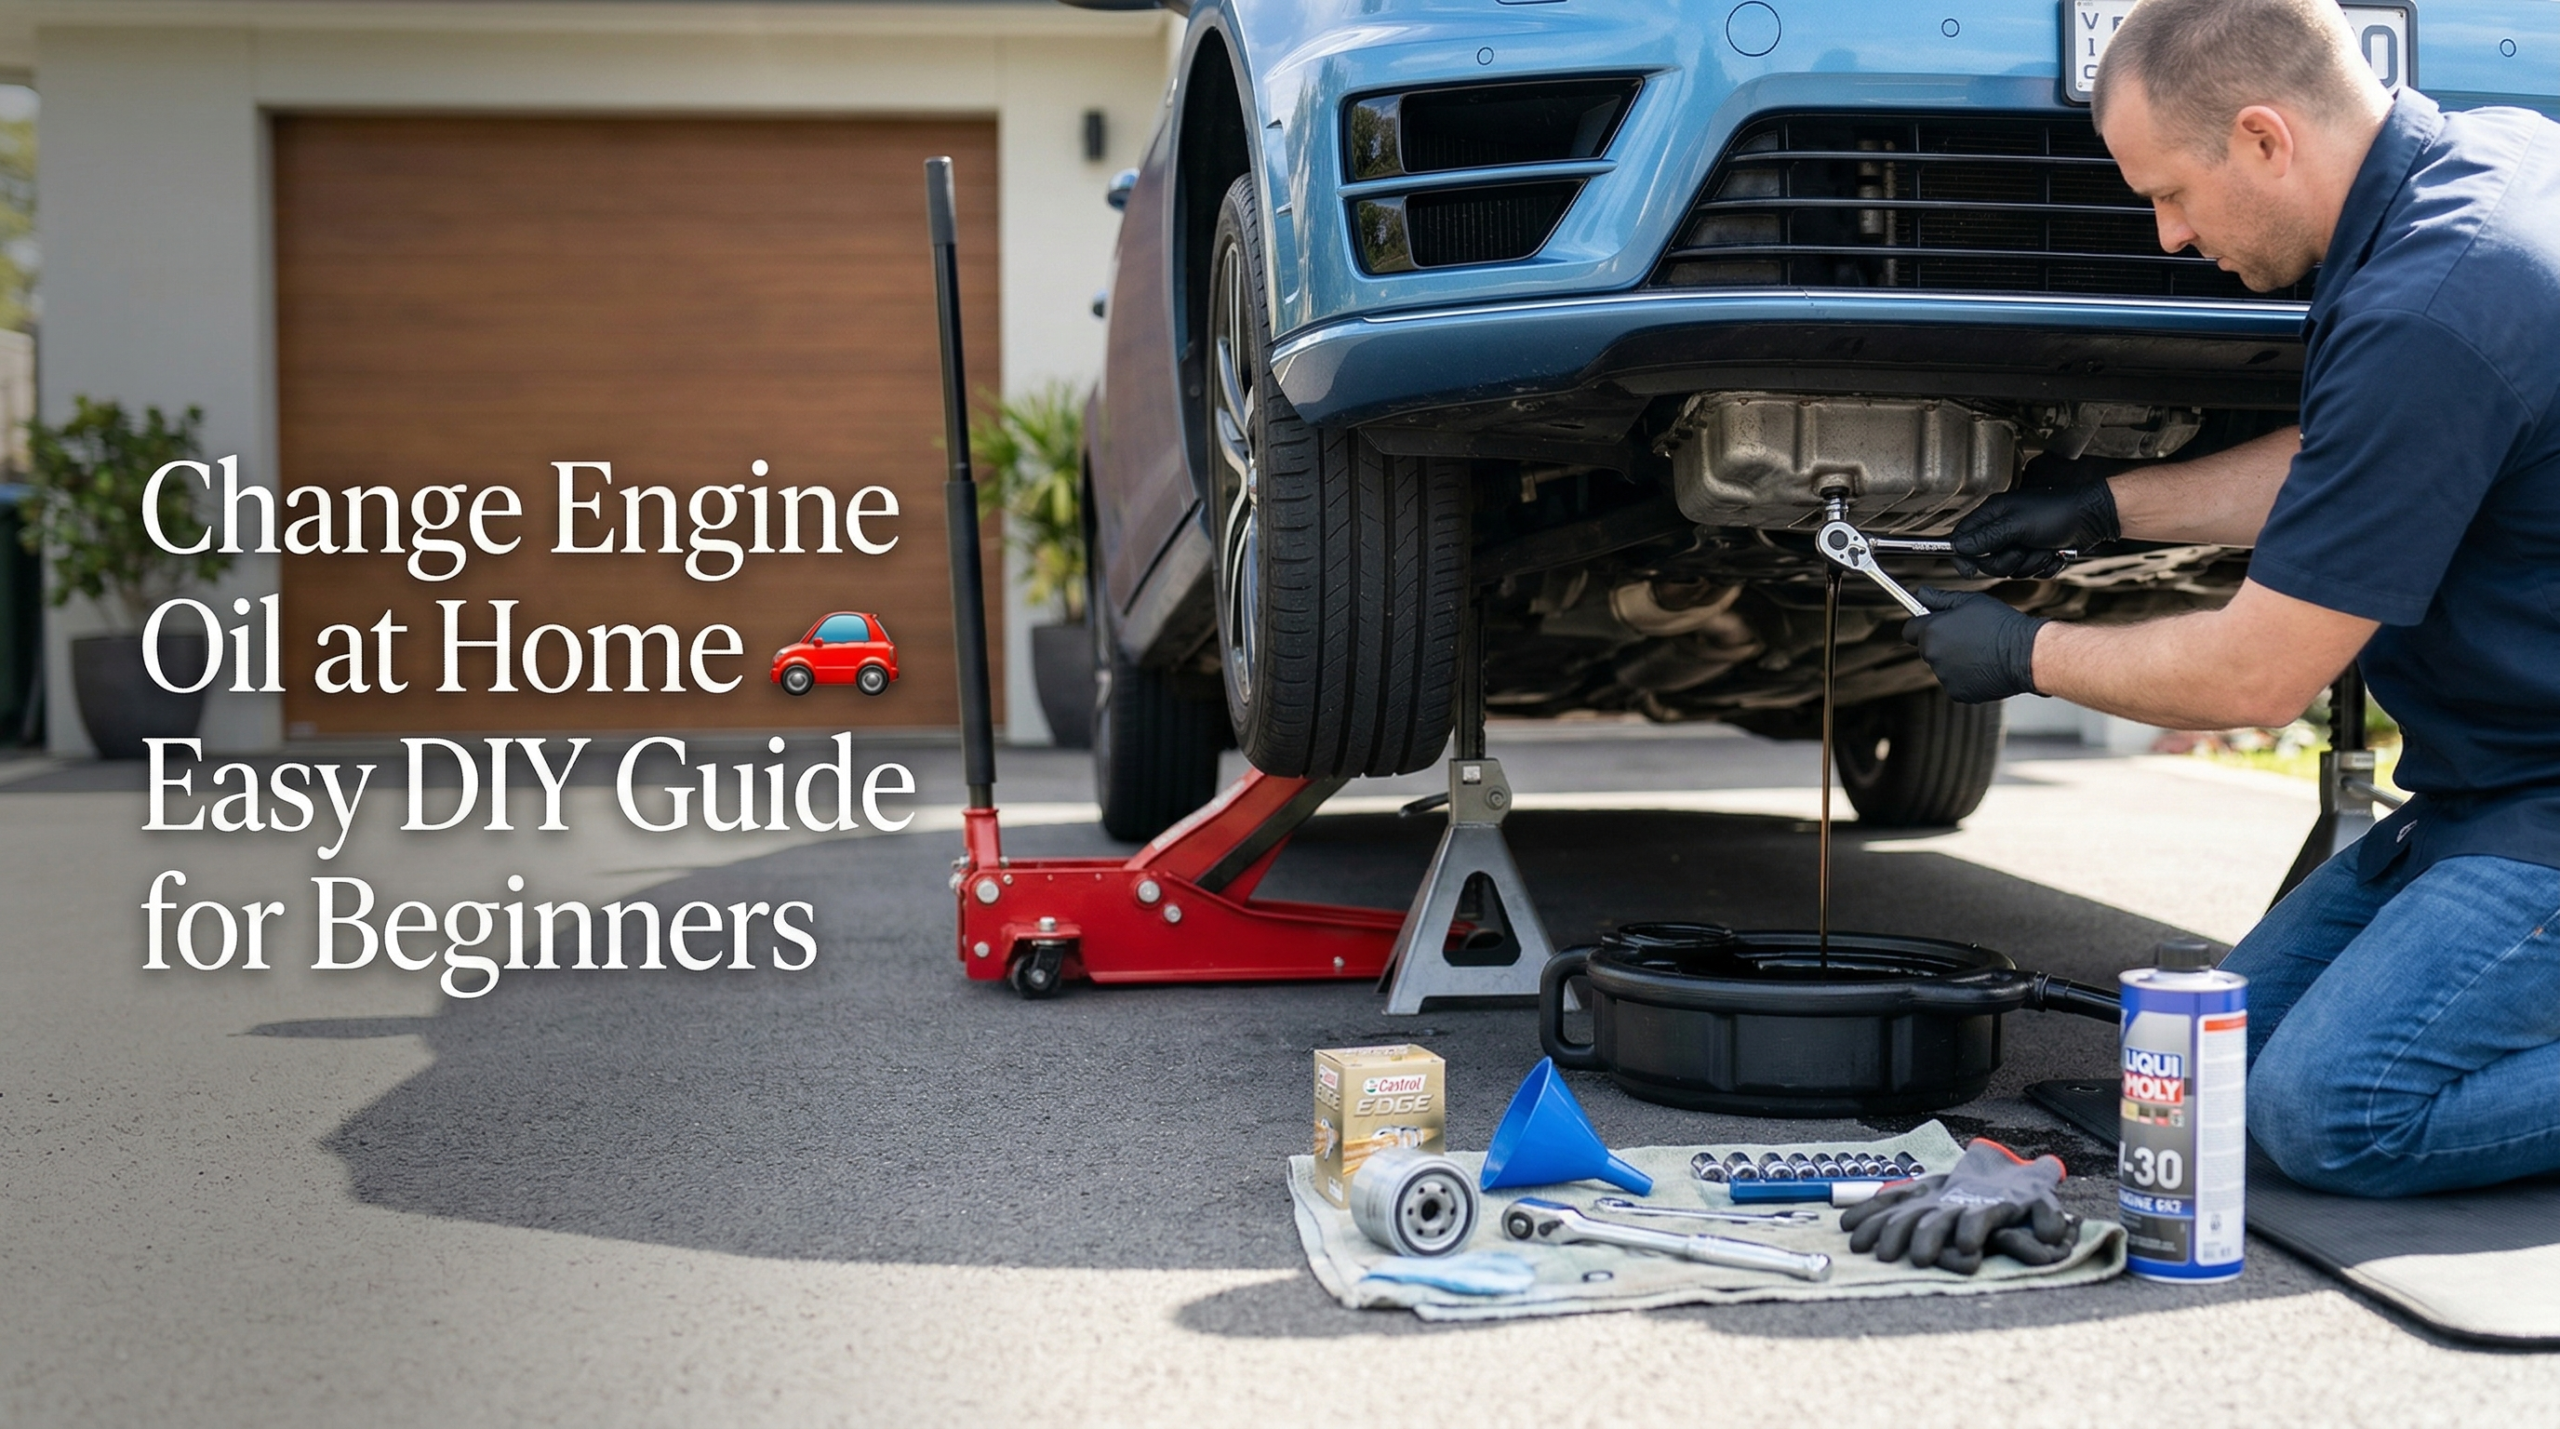
Changing engine oil at home involves draining old oil, replacing the oil filter, and refilling with the correct grade oil recommended by your vehicle manufacturer. With basic tools and proper safety steps, this DIY task improves engine life, saves money, and ensures better vehicle performance when done correctly.
I’ve been working as an automotive diagnostic technician for over 10 years, and I still remember the first time I tried changing engine oil on my own car at home. I thought I had everything ready but I forgot to position the drain pan correctly. Oil went everywhere, and cleanup took longer than the actual job.
That small mistake taught me something important: having the right setup matters just as much as knowing the steps. The good news is, once you do it properly the first time, it becomes one of the easiest maintenance tasks you can handle yourself.
Changing your engine oil at home is one of the easiest and most cost-effective ways to maintain your car. If you’re a beginner, this step-by-step guide will show you exactly how to change engine oil at home safely, save money, and keep your engine running smoothly.
Quick Answer:
Changing engine oil at home is a straightforward maintenance task that involves draining old engine oil, replacing the oil filter, and refilling with fresh oil that meets your vehicle’s specifications. When done correctly, it helps extend engine life, improve performance, and reduce long-term repair costs. With the right tools and safety precautions, the process can be done in under 30 minutes.
🔧 Tools You Need to Change Engine Oil
Before starting, gather these essentials:
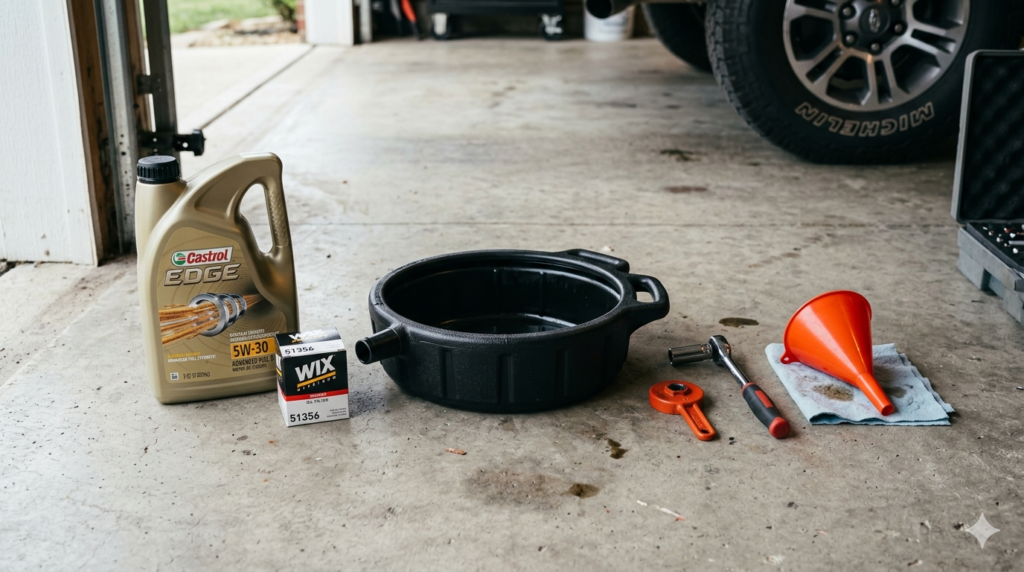
- Engine oil (check your car manual for the correct type)
- Oil filter (specific to your vehicle)
- Oil filter wrench
- Socket wrench set
- Oil drain pan
- Funnel
- Car jack & jack stands (or ramps)
- Gloves & safety glasses
- Old cloth or paper towels
👉 Pro Tip: Always use high-quality oil and filters to protect your engine long-term.
⏱️ When Should You Change Your Engine Oil?
Most cars need an oil change every:
- 5,000–7,500 km (conventional oil)
- 10,000–15,000 km (synthetic oil)
🚨 You should also change oil if you notice:
- Dark, dirty oil
- Engine noise increasing
- Oil warning light
🪜 Step-by-Step Guide to Changing Engine Oil
Step 1: Prepare Your Car
Park your car on a flat surface and let the engine cool down.
👉 Real-world tip:
From my experience, many beginners make the mistake of working on a slightly sloped surface. This can cause incorrect oil drainage and even safety issues. Always work on level ground.
Step 2: Drain Old Oil
When I first started as a technician, I rushed an oil drain and ended up with hot oil running down my arm not fun. Always let the engine cool slightly, then remove the drain plug slowly. Give it 10–15 minutes to fully drain you’d be surprised how much old oil stays behind if you rush it.

Place a drain pan under the oil plug and carefully remove it.
👉 Real-world tip:
If the engine is still warm, the oil will drain faster—but don’t do this when it’s too hot. I’ve seen beginners rush this step and end up with minor burns or messy spills.
Step 3: Replace Oil Filter
Remove the old oil filter and install a new one.
👉 Real-world tip:
A common mistake is over-tightening the new filter. Hand-tight is enough. Over-tightening can damage the seal and make it extremely difficult to remove next time.
Step 4: Add New Engine Oil
Overfilling oil is one of the most common mistakes I fix in the workshop. A customer once added “just a bit extra” and ended up with foaming oil and rough idling. Always check the dipstick after filling don’t guess. Engines are precise, not forgiving.
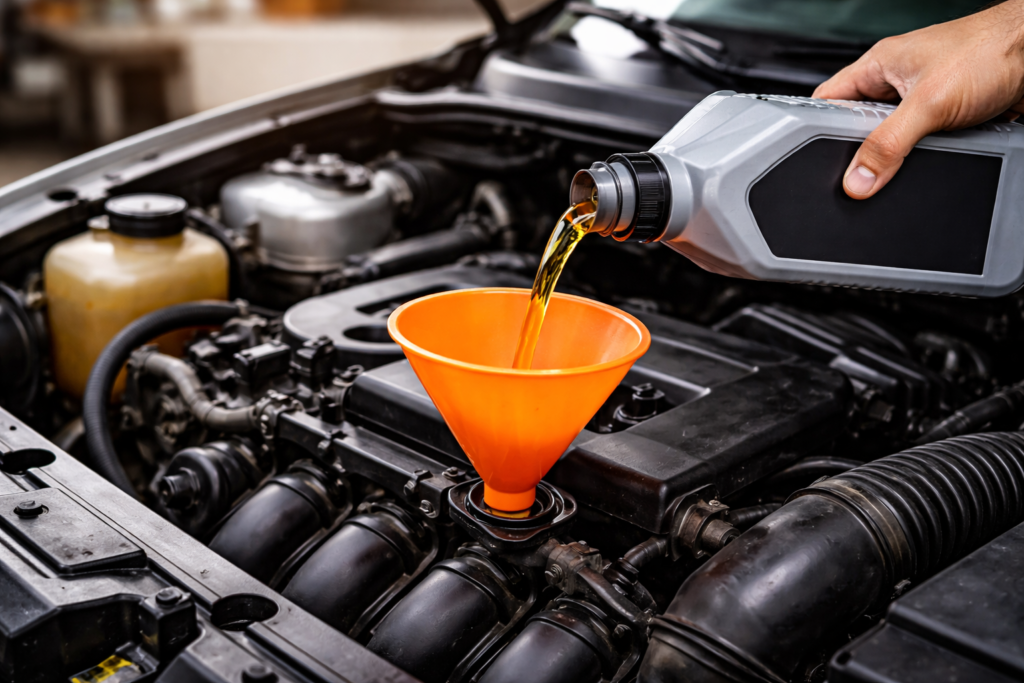
Use a funnel and pour in the recommended oil type.
👉 Real-world tip:
Don’t pour the full amount at once. Add gradually and check the level. Overfilling is a very common issue I see in workshops.
Step 5: Check Oil Level
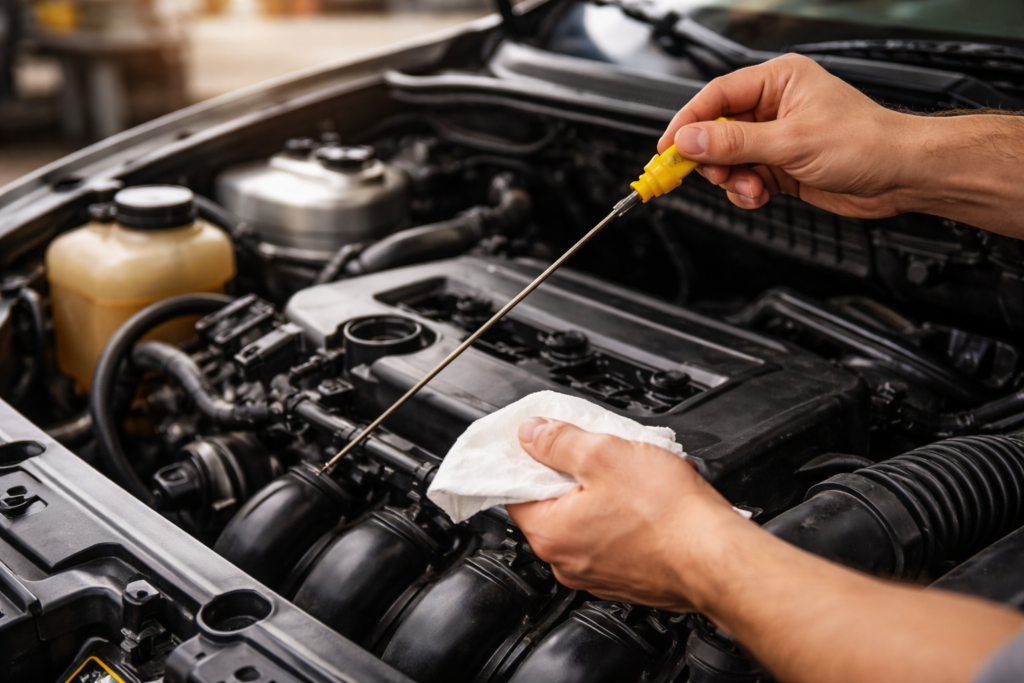
Use the dipstick to confirm the oil level is correct.
👉 Real-world tip:
Always wait a couple of minutes after adding oil before checking. This allows the oil to settle properly and gives an accurate reading.
❌ Common Mistakes to Avoid
I’ve seen too many DIY jobs go wrong just because someone relied only on a jack. One customer came in with a bent sump after the car slipped. Always use jack stands on a flat surface it’s not optional. Trust me, a 5-minute shortcut can cost you an engine
- Overfilling the oil
- Forgetting to replace the oil filter
- Not tightening the drain plug properly
- Using the wrong oil type
- Skipping safety precautions
🌱 How to Dispose of Used Oil Properly
Never pour used oil down the drain!
Instead:
- Store it in a sealed container
- Take it to a local recycling center or auto shop
🚀 Final Thoughts
Changing your engine oil at home is one of the best DIY car maintenance skills you can learn. It’s simple, cost-effective, and incredibly rewarding. If you follow the correct steps, use quality oil, and avoid common mistakes, this simple DIY task can keep your car running smoother for years. Trust me it’s worth doing right.
Once you’ve done it once, you’ll realize:
👉 It’s not just about saving money it’s about taking control of your car’s health.
❓ FAQs
Q1: How often should I change engine oil?
Honestly, it depends on your driving habits, but in most cases, every 5,000 to 10,000 km is a safe range. If you drive in heavy traffic or harsh conditions, you might need to do it more often.
Q2: Can beginners really change engine oil at home?
Yes, absolutely. If you’re like most beginners, it might feel intimidating at first—but once you do it once, you’ll realize it’s actually very straightforward.
Q3: What happens if I skip oil changes?
This is something I’ve seen many times in my 10+ years as a technician—old oil becomes dirty and thick, which can lead to serious engine damage over time. It’s one of the easiest things you can do to avoid expensive repairs.
Q4: Is it cheaper to change engine oil at home?
The good news is, yes. You can save a decent amount of money over time, especially if you already have the basic tools.